Monday, April 30, 2012

A Place for Everything and Everything in its Place

My attempt to get organized in a fun and fashionable way has spread from my home to the office at my internship. I love my internship but I must say things are very chaotic in our office. I attempt to spend a few minutes every day organizing something new.While that is not always possible things are slowly but surely getting better. I have tons of spectacular shelf space that I can take advantage of in my quest to get things neat but the problem is I end up with stacks of stuff on the shelf. Not the most pleasing to the eye. Therefore, I decided to decorate a few different containers to help keep things together.


These boxes are super easy to make. Just take an old cardboard box, cut off the edges and glue scrapbook paper to them. I used Mod Podge  because it is my favorite glue and also holds paper very firmly in place; but you could probably use rubber cement or even just Elmer's School Glue.

After  the success of these boxes I decided to make a few more for my apartment as well as some pen/marker/paintbrush/everything else holder from old beer packaging. I originally saw this idea on pinterest from Cat on a Limb and knew I had to make it. So here is what I did:


Supplies needed are:

Mod Podge, Tape, Paint, Brushes, Paper Cutter, Xacto knife, Sturdy Cardstock, fun printed paper


Method: 

Cut out all of the outer pieces of paper you will be using


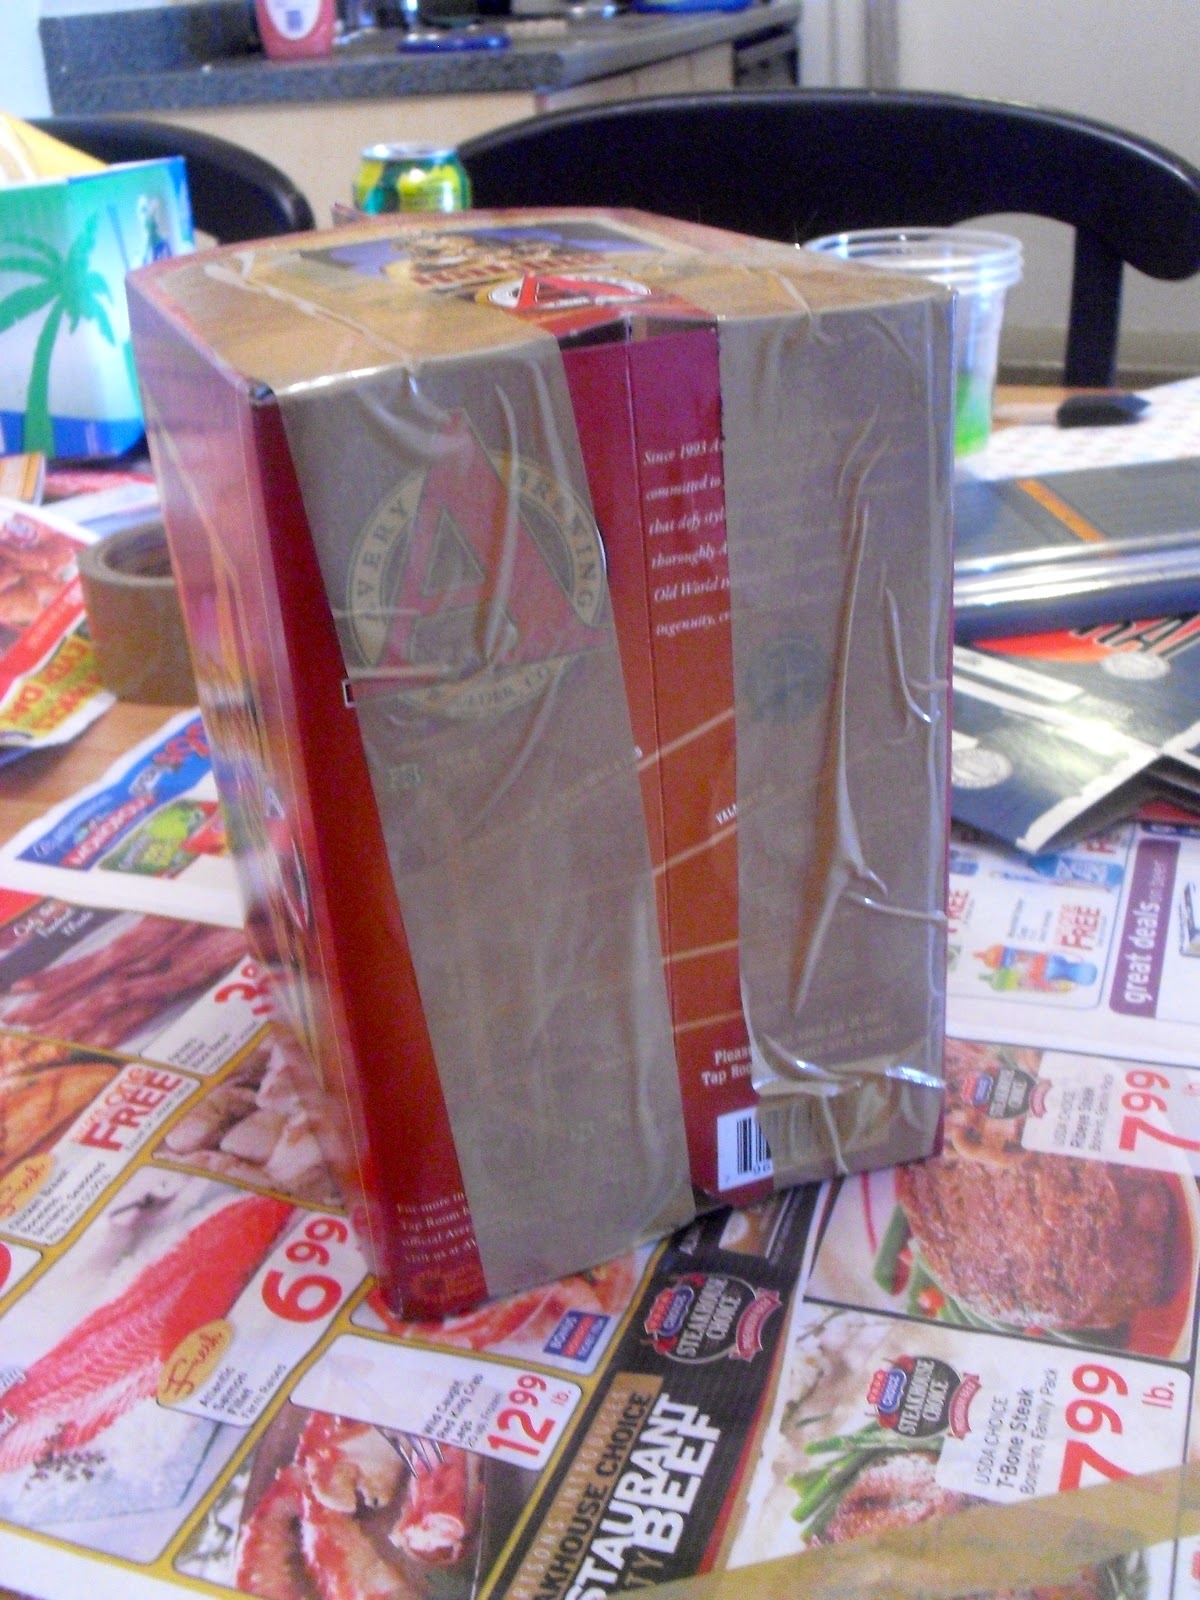
Tape the bottom of the boxes so they' stand sturdy and are easier to work with. My tape got a few bubbles in it but this was the last one I made so I wasn't too worried about it. And you cannot tell anyways.


Paint the inside of the boxes. The color of paint should match what ever color paper you will be using inside as dividers. I also painted any raw edges. The painting does not have to be exact because most of it will be covered up. Wait for it to dry.


Insert cut and folded pieces of cardstock into the carrier. Since I painted the inside of the carrier I only had to use enough to cover the holes in the sides and bottom, So two pieces of card stock divided in to slightly less than thirds. 


Glue the inserts into the box. Then glue your patterned paper to the outside. Finally, take your Xacto knife and trim any edges. 
Voila! Fun recycled caddies!


Thursday, April 26, 2012

A Little Extra Space

Lately, I have been fantasizing about the day when I will have my own place, no roommates other than the animals and a spare room to use for crafts. How nice it would be to have my bedroom just be my bedroom. I have created a pinterest board with all of the ideas that I would use for my own craft room. Go check it out here and follow me as well. Here are a few of my favorite ideas:

These are just magazine racks on shelfs but they work great for sorting the yarn by color.


Different closet organizers for craft stuff. I need this for my ribbon!!!


Organize odds and ends with jars.


Basically my dream space! Lots of storage and big comfy chair to sit in!


While I don't have a craft room right now, I do have a bunch of storage space that I am in the middle of revamping to make it easier to access all my craft supplies. Expect a couple of post in the next few days about how that is going. 


Wednesday, April 18, 2012

I Left My Heart in San Francisco....


After a whirlwind trip, I am back from the Bay area. I had grand ambitions to take tons of pictures with my new iphone, well that definitely did not happen but here are the few that I did take.


This trip has definetly cemented my decision that I want to move out there. It is where I feel I need to be at this point in my life. I have no idea what I will be doing when I get there, however. So by January 2013 (assuming the world hasn't ended) I will be a resident of California!


I have a quick crochet project for you all that I made right before I left for the Bay. And when I say project I really mean a redo of another project I did. This crocheted purse to be exact. I made this bag several months ago and have not been happy with it. It was too stretchy. So I deconstructed the bag and was left with a large crocheted square. Here is how I turned the rectangle into a computer case.


The length of the rectangle was about 3 times that of my computer, so I folded into thirds making sure to leave a few extra inches on one end. Refer to the diagram above. I then crocheted the sides of panel two and panel three together using a single crochet stitch. This is the front of the computer case.

Then single crochet the side of panel 1 to your combined 2 and 3 panels. Essentially you are making a large envelope.

Row 1: On the edge of the flap, half double crochet across 1 time.
Row 2: Ch2 and half double crochet until you are halfway across Ch 2, skip 2 hdc (this is the button hole) and hdc across until end.
Row 3 and 4: Ch 2, Hdc across in each stitch until end. Fasten off.

Attach Button in appropriate spot.


Maybe someday I will go back and actually make one of these form scratch instead of from a project I didn't like. If I do I will actually write out the pattern for every one. Or is someone really wanted me to I could do it anyways. Just ask :)


Thursday, April 12, 2012

I'm as Busy as a Spider Spinning Day Dreams

So I know I posted about this not to long ago (here) but seriously where has this year gone? Anyone know? How can it already be well into April. I feel like it was just New Years. Although interestingly enough somethings seem to feel like they happened a ridiculously long time ago. Does anyone else ever get that feeling?

Enjoying Instagram
I have been crazy busy as usual and haven't really had time to post very much. I also have several half completed project that I need to finish up before I can share them with you. There will be some fun organizational crafts, some home decorating and some crochet. Also keep an eye out for an amazing summer give away around the first of May.

 I spent several hours at the Salon getting an Amazing cut and color. 

So I had this great idea that I was going to decorate my own iphone case with glitter instead of buying a  really expensive one. In theory this was a great idea as you can see:

However, the execution of this wasn't the best. I used Mod Podge on the case and it didn't seem to hold very well. Actually, it didn't hold at all. I now some dried glittery glue and a slightly gunky black case. Oh well, not everything turns out like you plan but I will decorate an iphone case soon!!!


I am currently sitting in a restaurant at the airport waiting for my flight to San Francisco, drinking ok glass of wine and eating horrible nachos. Seriously, the nachos are better at sporting events or even Taco Bell!!!! Besides the nachos, I love this part of a trip. The days/morning before you leave are always so stressful and then once you arrive at your destination there is always so much to do. At least for an hour or so I have time at the airport to just relax and enjoy the fact that I am now on vacation! This is the reason that I finally have time to write a blog post!

I might have slightly over packed.....
So stay tuned for pictures from the trip and new projects (including an iphone case :)


Post Title from the song "It is Might As Well Be Spring" from the Musical State Fair by Rodgers and Hammerstein.

Tuesday, April 3, 2012

Crocheted Grocery Bag Dispenser


If your house is anything like mine, you probably have tons of plastic bags sitting around. As much as I try to use reusable market bags, I don't always remember to bring them to the store or end up buying more than fits into the bag. With my two furry babies these plastic bags do get used, either to line Rowena's Littermaid or as poop bags for Kingston. Before, I had the animals we would take the extra bags back to the store to be recycled but now I have to start storing them. The bags have been slightly taking over the top of my fridge so I decided to crochet a holder for them. The original idea came from The Crochet Dude but I made my own pattern. This is untested so if you do see any problems please let me know.

Materials
Chunky/Rug Weight Yarn (I used some yarn that I stole from my Mom's stash. Not sure what brand it is).
K Hook
2 Elastic Hair Bands

Stitches used:

Single Crochet: sc
Double Crochet: dc
V Stitch: double crochet, chain , double crochet (dc, ch 1, dc)
Treble Crochet V Stitch: treble, chain 1, treble (tr, ch 1, tr)

Row 1: Join yarn to elastic hair band. Ch 3, dc 19 times around, join with slip stitch to ch 3.
Row 2-3: Ch 3, dc in back loop 19 times, join with slip stitch to ch 3
Row 4: Ch 4, dc in same space. *Skip next stitch (dc, ch 1, dc) repeat from * times. Join with slip stitch in ch 3.
Row 5-14: Ch 5, treble in same space, *(tr, ch 1, tr) in ch1 space. Repeat from* around Join with slip stitch in ch 4.
Row 15: Ch 4, dc in same space. *Skip next stitch (dc, ch 1, dc) repeat from * times. Join with slip stitch in ch 3.
Row 16: Ch 3, dc in each stitch around, join with slip stitch to ch 3. (20 dc).
Row 17: Ch 3, dc in back loop 19 times, join with slip stitch to ch 3.
Ring for Hanging. Work 34 sc around the elastic band. Slip st to next st on Row 29. Fasten off.


Crocheted around elastic hair band


Bottom of the holder
Ring to hang


I think I want to make another version using worsted weight yarn that is slightly smaller to hang in the car. If I do end up making it I will post the changes needed.